Developing for pygamer using cmake
DISCLAIMER: Sorry, this post is about boring code shit i just don’t want to learnt to do again later. It’s only a few things but it took me days to get a handle on.
Using cmake instead of the arduino ide is really nice, it works well in both text editors (emacs and vscode) and you get context-aware completion, hover docs, etc.
1. Get Arduino-CMake-Toolchain:
$ cd ~/projects
$ git clone <https://github.com/a9183756-gh/Arduino-CMake-Toolchain>
2. Start your project:
$ mkdir cool_project
$ cd cool_project
$ touch main.cc
$ $EDITOR CMakeLists.txtCMakeLists.txt:
cmake_minimum_required(VERSION 3.19.0)
project(cool_project CXX)
add_executable(cool_project main.cc)

# `AUTO_PUBLIC` will automatically find and link the right libraries
# from your installed arduino libraries, just like the arduino IDE!
target_link_arduino_libraries(bleepbloopmachine AUTO_PUBLIC)

# this will add an `upload` target that you can use to build &
# upload to the microcontroller
target_enable_arduino_upload(bleepbloopmachine)
3. Use cmake!
$ mkdir build
$ cd build
$ cmake -D CMAKE_TOOLCHAIN_FILE=$HOME/projects/Arduino-CMake-Toolchain/Arduino-toolchain.cmake -D CMAKE_EXPORT_COMPILE_COMMANDS=1 ..
This will generate a compile_commands.json file that your editor can use to give you completion hints and docs.
4. Setup vscode!
If you’re using Code:
-
install the cmake tools extension.
-
Run the command
CMake: Edit User-Local CMake Kits -
add this kit to the array:
{
 "name": "Arduino toolchain",
 "toolchainFile": "/home/chee/projects/Arduino-CMake-Toolchain/Arduino-toolchain.cmake"
}
(change the toolchainFile path to the correct path for wherever you cloned the cmake arduino toolchain to in the very first step)
-
Run the command
CMake: Select A Kitand selectArduino toolchainfrom the drop-down -
Now you can use
CMake: Build(F7) andCMake: Build Targetuploadto build and upload things to the microcontroller!
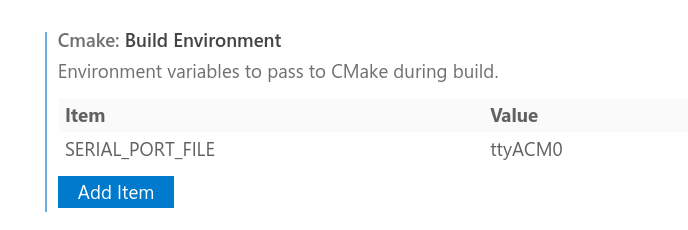
getting the upload target working
Set the environment variable SERIAL_PORT_FILE to ttyACM0 (or whatever the microcontroller’s serial port is on your computer) in the workspace’s cmake.buildEnvironment setting: