British Summer Time GMT+1

today.snoot.club

Last year me and Abe started working on some art together.

It's called today.

the today logo and favicon, made by abe.
it's a black and white plant pot and plant on a pixelated rainbow gradient.

today

Each page has a picture made by Abe with Word '97 in a Windows 98 Virtual Machine, and a looping sound by me.

office '97 logo

old windows logo

I make the sounds with a Nintendo Game Boy, a handheld compact cassette recorder and a teenage engineering op-1.

a game boy with a cat face on the screen

teenage engineering op-1 cow fx. a black cow silhouette with flashing neon pipes

You can view the next sound/picture pair by clicking the picture, eventually you'll loop around.

The most recent one is on the homepage/.

There's an RSS feed you can subscribe to, and you can append .json to any page (including the root!) to get a JSON representation of that page. Feel free to do whatever you want with that. The sounds and pictures are all creative commons share-alike.

day manager

Originally it was just a few HTML files, but when it started to take shape I wrote some scrappy JavaScript to generate the pages from a JSON file.

But that meant it was a manual process to put something live, or even preview a pairing.

So then I put together an app to manage the page. It takes uploaded media and puts it in Linode Object Storage (which is like S3 but without giving money to jeff).

There are three concepts. **sounds**, **pictures** and **days**.

sounds

The page for sounds shows a grid of every sound that isn't part of a day.

screenshot of the sounds page, showing three un-dayed sounds.

you can click one to preview it, and you can drag a .flac file onto the window to upload a new one. It'll get a random name like spooky ocean. (adjectiveish noun).

pictures

The pictures page is a grid of all the pictures, paired or not.

screenshot of the pictures page. two used and one unused picture.

This is where you add the alt text, and also where you can select the Make a day of it button.

make a day of it

The make a day of it page is where you can preview how a particular picture will work with each available sound.

the “make a day of it” page

When you find something that works, you can give it a name and it will be the new homepage the very next moment.

days

The days page shows a grid of every day there's ever been.

the homepage of today manager showing days

danger mode

It's scary to have delete buttons lying around, so those are hidden behind DANGER MODE, which can only be activated by manually adding ?danger=danger to the URL.

After deleting anything, you're redirected back to the non-danger page.

goodbye

ok, that's all. thanks.
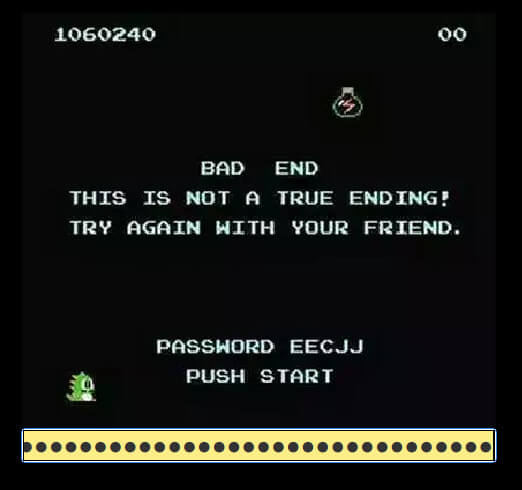
password entry screen. it's the bad ending from bubble bobble.

⭐⭐⭐⭐⭐

=^.^=

Greenwich Mean Time GMT

Developing for pygamer using cmake

DISCLAIMER: Sorry, this post is about boring code shit i just don't want to learnt to do again later. It's only a few things but it took me days to get a handle on.

Using cmake instead of the arduino ide is really nice, it works well in both text editors (emacs and vscode) and you get context-aware completion, hover docs, etc.

1. Get Arduino-CMake-Toolchain:

$ cd ~/projects
$ git clone <https://github.com/a9183756-gh/Arduino-CMake-Toolchain>

2. Start your project:

$ mkdir cool_project
$ cd cool_project
$ touch main.cc
$ $EDITOR CMakeLists.txt

CMakeLists.txt:

cmake_minimum_required(VERSION 3.19.0)
project(cool_project CXX)
add_executable(cool_project main.cc)

# `AUTO_PUBLIC` will automatically find and link the right libraries
# from your installed arduino libraries, just like the arduino IDE!
target_link_arduino_libraries(bleepbloopmachine AUTO_PUBLIC)

# this will add an `upload` target that you can use to build &
# upload to the microcontroller
target_enable_arduino_upload(bleepbloopmachine)

3. Use cmake!

$ mkdir build
$ cd build
$ cmake -D CMAKE_TOOLCHAIN_FILE=$HOME/projects/Arduino-CMake-Toolchain/Arduino-toolchain.cmake -D CMAKE_EXPORT_COMPILE_COMMANDS=1 ..

This will generate a compile_commands.json file that your editor can use to give you completion hints and docs.

4. Setup vscode!

If you're using Code:

  1. install the cmake tools extension.

  2. Run the command CMake: Edit User-Local CMake Kits

  3. add this kit to the array:

    {
     "name": "Arduino toolchain",
     "toolchainFile": "/home/chee/projects/Arduino-CMake-Toolchain/Arduino-toolchain.cmake"
    }

    (change the toolchainFile path to the correct path for wherever you cloned the cmake arduino toolchain to in the very first step)

  4. Run the command CMake: Select A Kit and select Arduino toolchain from the drop-down

  5. Now you can use CMake: Build (F7) and CMake: Build Target upload to build and upload things to the microcontroller!

getting the upload target working

Set the environment variable SERIAL_PORT_FILE to ttyACM0 (or whatever the microcontroller's serial port is on your computer) in the workspace's cmake.buildEnvironment setting:

Greenwich Mean Time GMT

pygamer nanoloop clone pt i

I'm working on a clone of Oliver Wittchow's nanoloop for the Adafruit PyGamer.

The prototype was written in CircuitPython, which is a lovely language, but it doesn't (yet) have support for the kinds of audio things I want to do.

It was helpful to use it to lay out the shape of the state object, and the controls and the UI.

The audio was unuseable, so I've rewritten it in C++.

It's coming along very well.

There are 4 sound channels available for use, using the fab Teensy Audio Library:

  • square
  • pulse
  • sawtooth
  • noise

The **e**nv**e**lop**e** menu item let's you change the attack, decay, sustain volume, amplitude and panning of your note block with cute visual indicators of each property.

There is a filter and a delay feature, and each channel can play at full speed, half speed or quarter speed. You can alter the bpm in the second menu.

It's a lot of fun.

The plans for the next session (this evening?) are:

  • add a pitchbend envelope (for the **m**od menu item)
  • add UI for delay and filter
  • use the neopixel array on the base of the PyGamer to indicate the current bar (the loop plays for 4 bars, things on /2 or /4 speed play twice or once during that time)

Future plans are to introduce pattern chaining, pattern-length (per-channel), using square curves for attack and decay and chords (positive integer intervals).

The code is very bad and available here:

https://git.snoot.club/chee/bleepbloopmachine

It's already starting to diverge from nanoloop, and I hope it will continue to forge its own identity until it can stand strong as its own independent interesting instrument.

Greenwich Mean Time GMT

Snootclub Maté

an overnight recipe

Ingredients

  • handful brown sugar
  • handful white sugar
  • 1 lemon, sliced
  • ~120g yerba mate
  • ~litre still water
  • ~litre sparkling water

Directions

  1. squeeze the lemon slices into the bottom of a litre jar with a tight lid, i’ve used a kilner
  2. add the handfuls of sugar, and stir until dissolved
  3. drop the lemon slices and yerba maté in
  4. fill the jar with the still water, (you might need to put the lid on and shake it to soak the tea, so you can fill it to the top)
  5. put it in the fridge for 8-12 hours or overnight
  6. strain the liquid through a cheesecloth (or a sieve will do, the pieces are quite big) and mix 50/50 with sparkling water
  7. serve in large glasses with ice

— chee (hi@chee.party)

Greenwich Mean Time GMT

using /dev/gpiomem on archlinux arm

imagine you have a raspberry pi running arch linux arm, and you want to use the python library RPi.GPIO.

that requires a /dev/gpiomem device, which is a hacky /dev/mem derivative that allows you to access the gpio pins without being root. which is important if you want to also be able to access a normal user’s dbus session, or anything else where you’d like to not be root while running the python.

arch linux arm uses raspberrypi’s kernel fork, but doesn’t set up the gpiomem device the way it’s needed for RPi.GPIO to work.

Add a gpio user

as root, create a gpio user

groupadd gpio
usermod -aG gpio alarm # alarm is the name of the default archlinuxarm user

setup udev

Make a file called /etc/udev/rules.d/pins.rules and put this in it:

SUBSYSTEM=="bcm2835-gpiomem", KERNEL=="gpiomem", GROUP="gpio", MODE="0660"
SUBSYSTEM=="gpio", KERNEL=="gpiochip*", ACTION=="add", PROGRAM="/bin/sh -c 'chown root:gpio /sys/class/gpio/export /sys/class/gpio/unexport ; chmod 220 /sys/class/gpio/export /sys/class/gpio/unexport'"
SUBSYSTEM=="gpio", KERNEL=="gpio*", ACTION=="add", PROGRAM="/bin/sh -c 'chown root:gpio /sys%p/active_low /sys%p/direction /sys%p/edge /sys%p/value ; chmod 660 /sys%p/active_low /sys%p/direction /sys%p/edge /sys%p/value'"

you may also wish to append this line, if you’re going to need spi access too:

SUBSYSTEM=="spidev", GROUP="spi", MODE="0660"

reboot

reboot, run the python, no root,